Typ 5-objęty
numer artykułu 046350


Skręcane zamknięcie punktów mocowania szalunku - maksymalne bezpieczeństwo i wyjątkowy wygląd
Dodaj do listy powiadomieńNajważniejsze informacje w skrócie

![]()

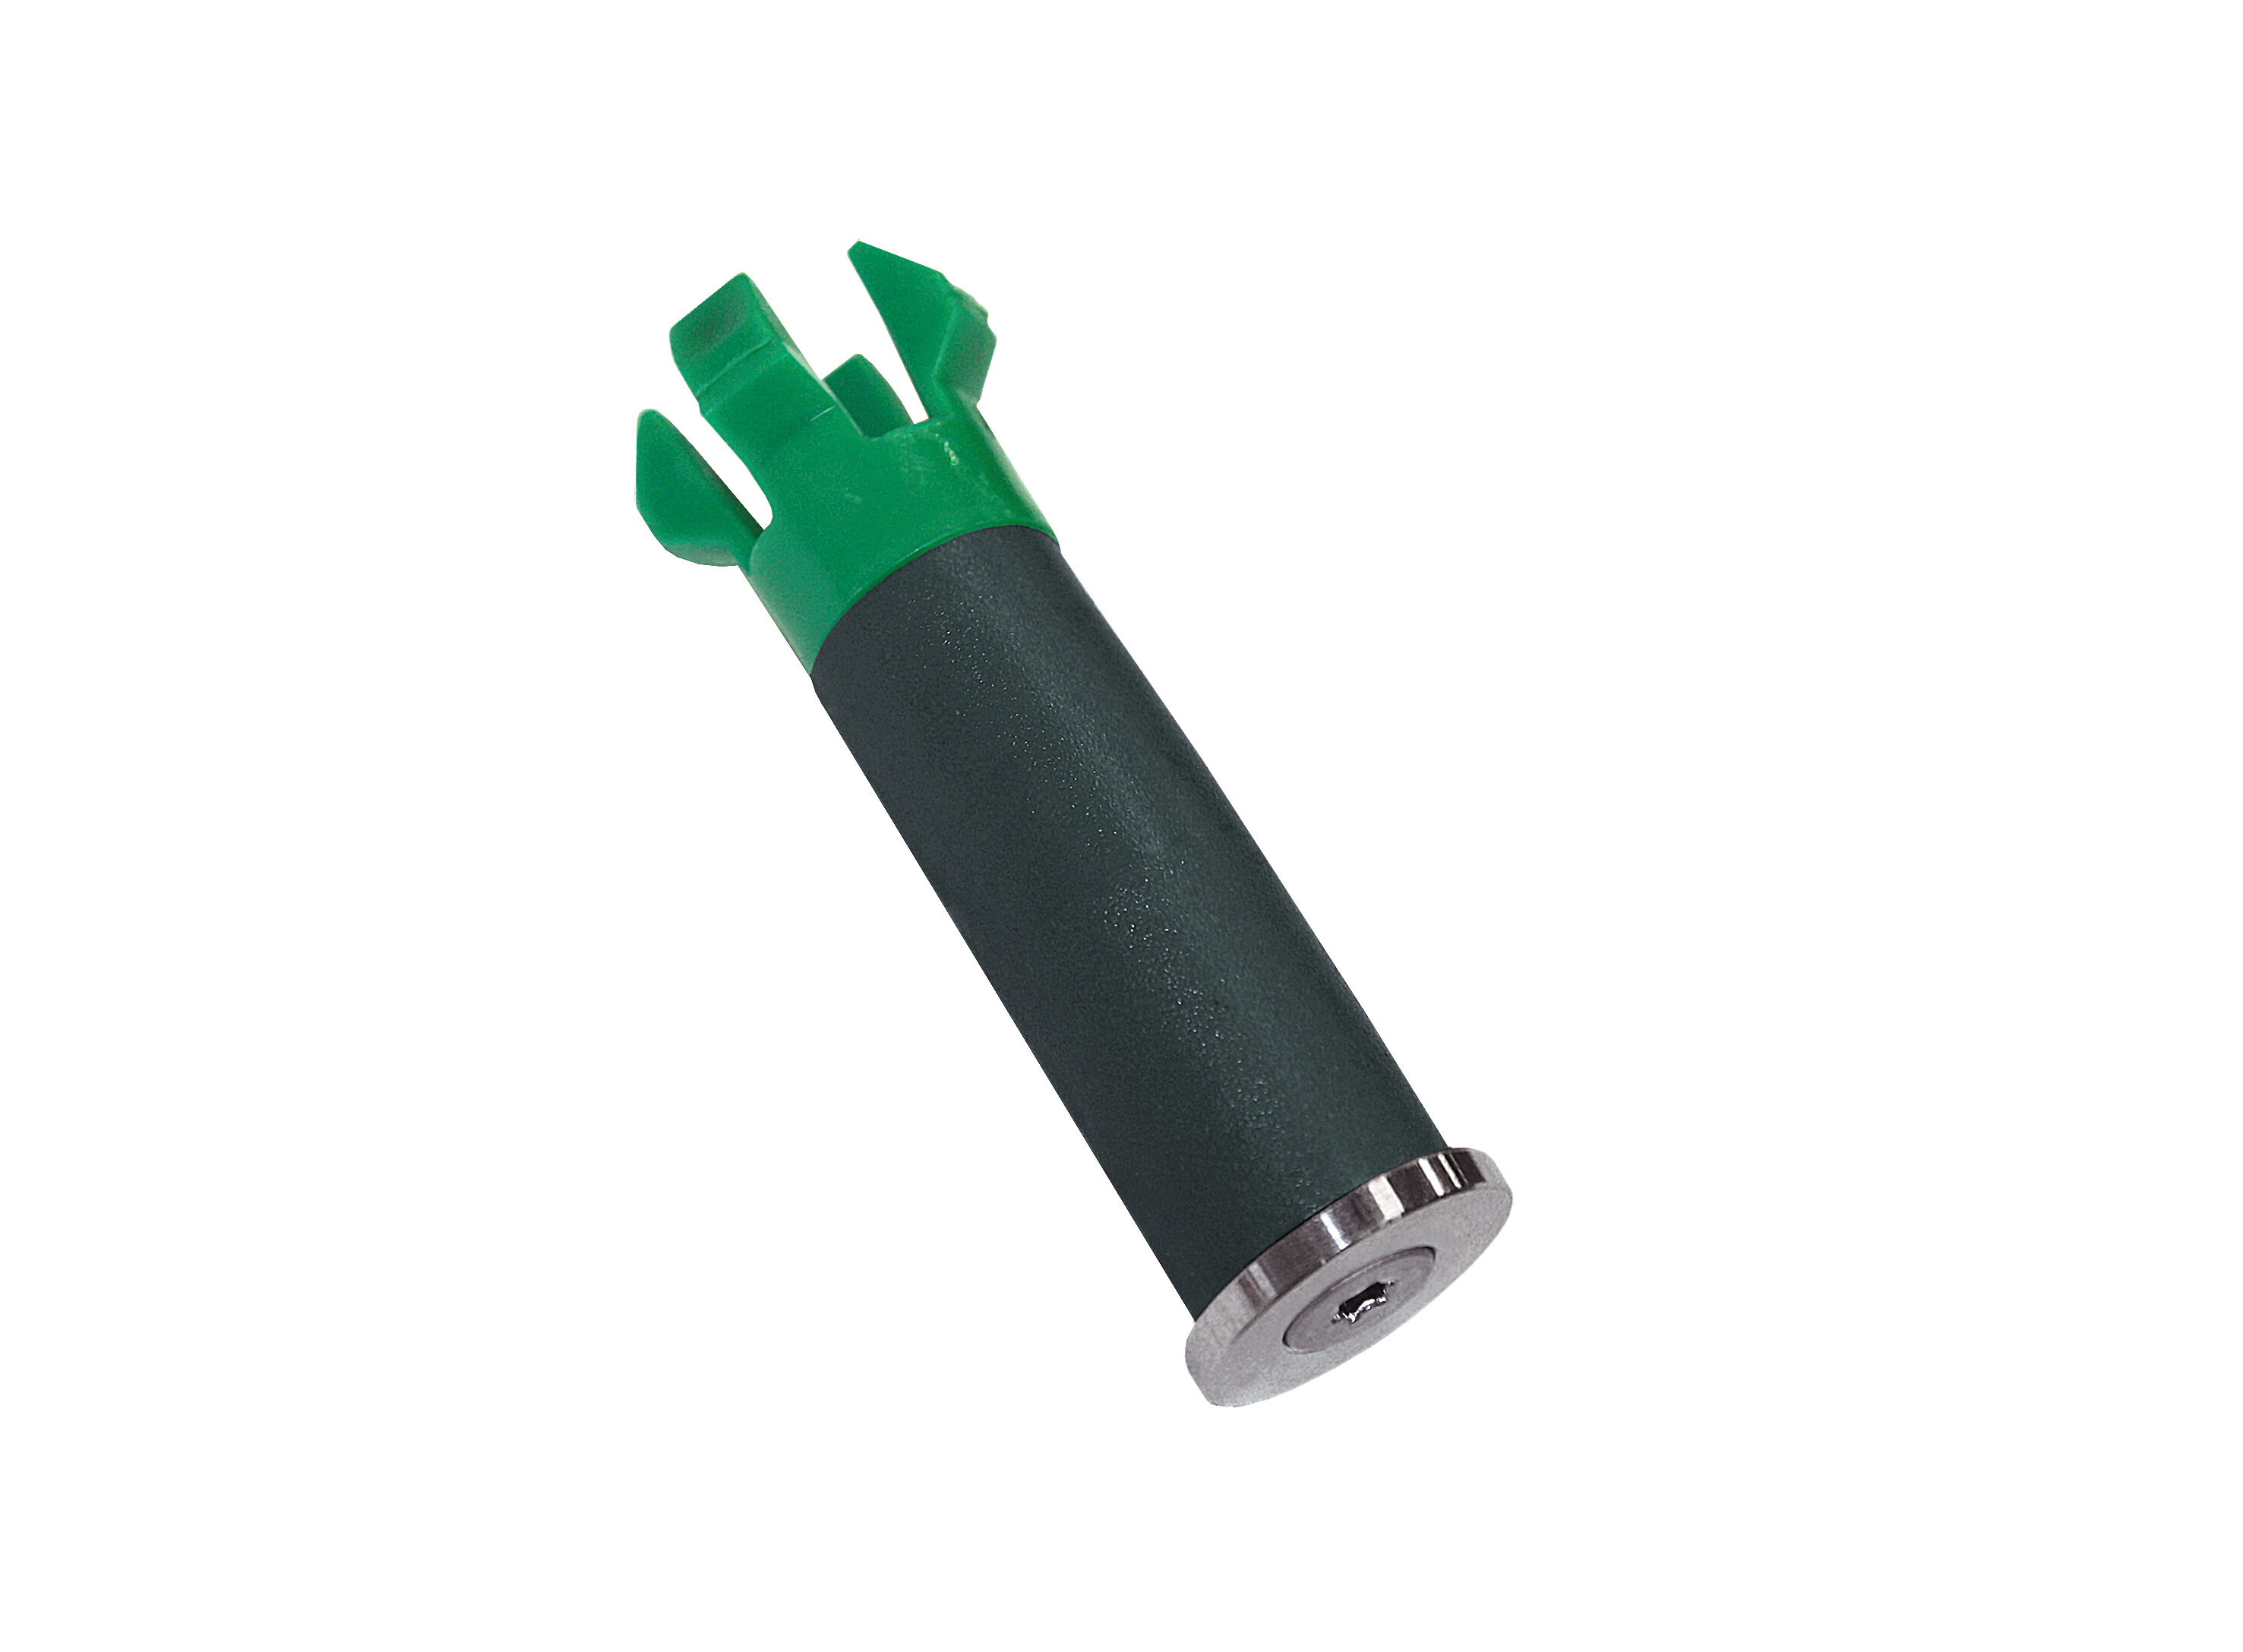
Śruba / nakrętka / tarcza dociskowa: stal nierdzewna V2A
Uszczelka gumowa: elastomer termoplastyczny
Pazur: polioksymetylen
Nakrętka: srebrna
Tarcza dociskowa: srebrna
Guma uszczelniająca: czarna
Pazur: zielony
25 do 28 mm
32 mm
75 mm
Nie
Ja

Scope of delivery
The STOPPER SCREW type covered is delivered ready for installation in a plastic bucket (100 pcs.). Each bucket contains 4 bits, which are attached to the inside of the lid. (Type 6: 50 pcs. and 2 bits)

Installation tools
For installation you need:
- Cleaning brush
- Cordless screwdriver
- Hammer for driving in and positioning
- Torque control tool

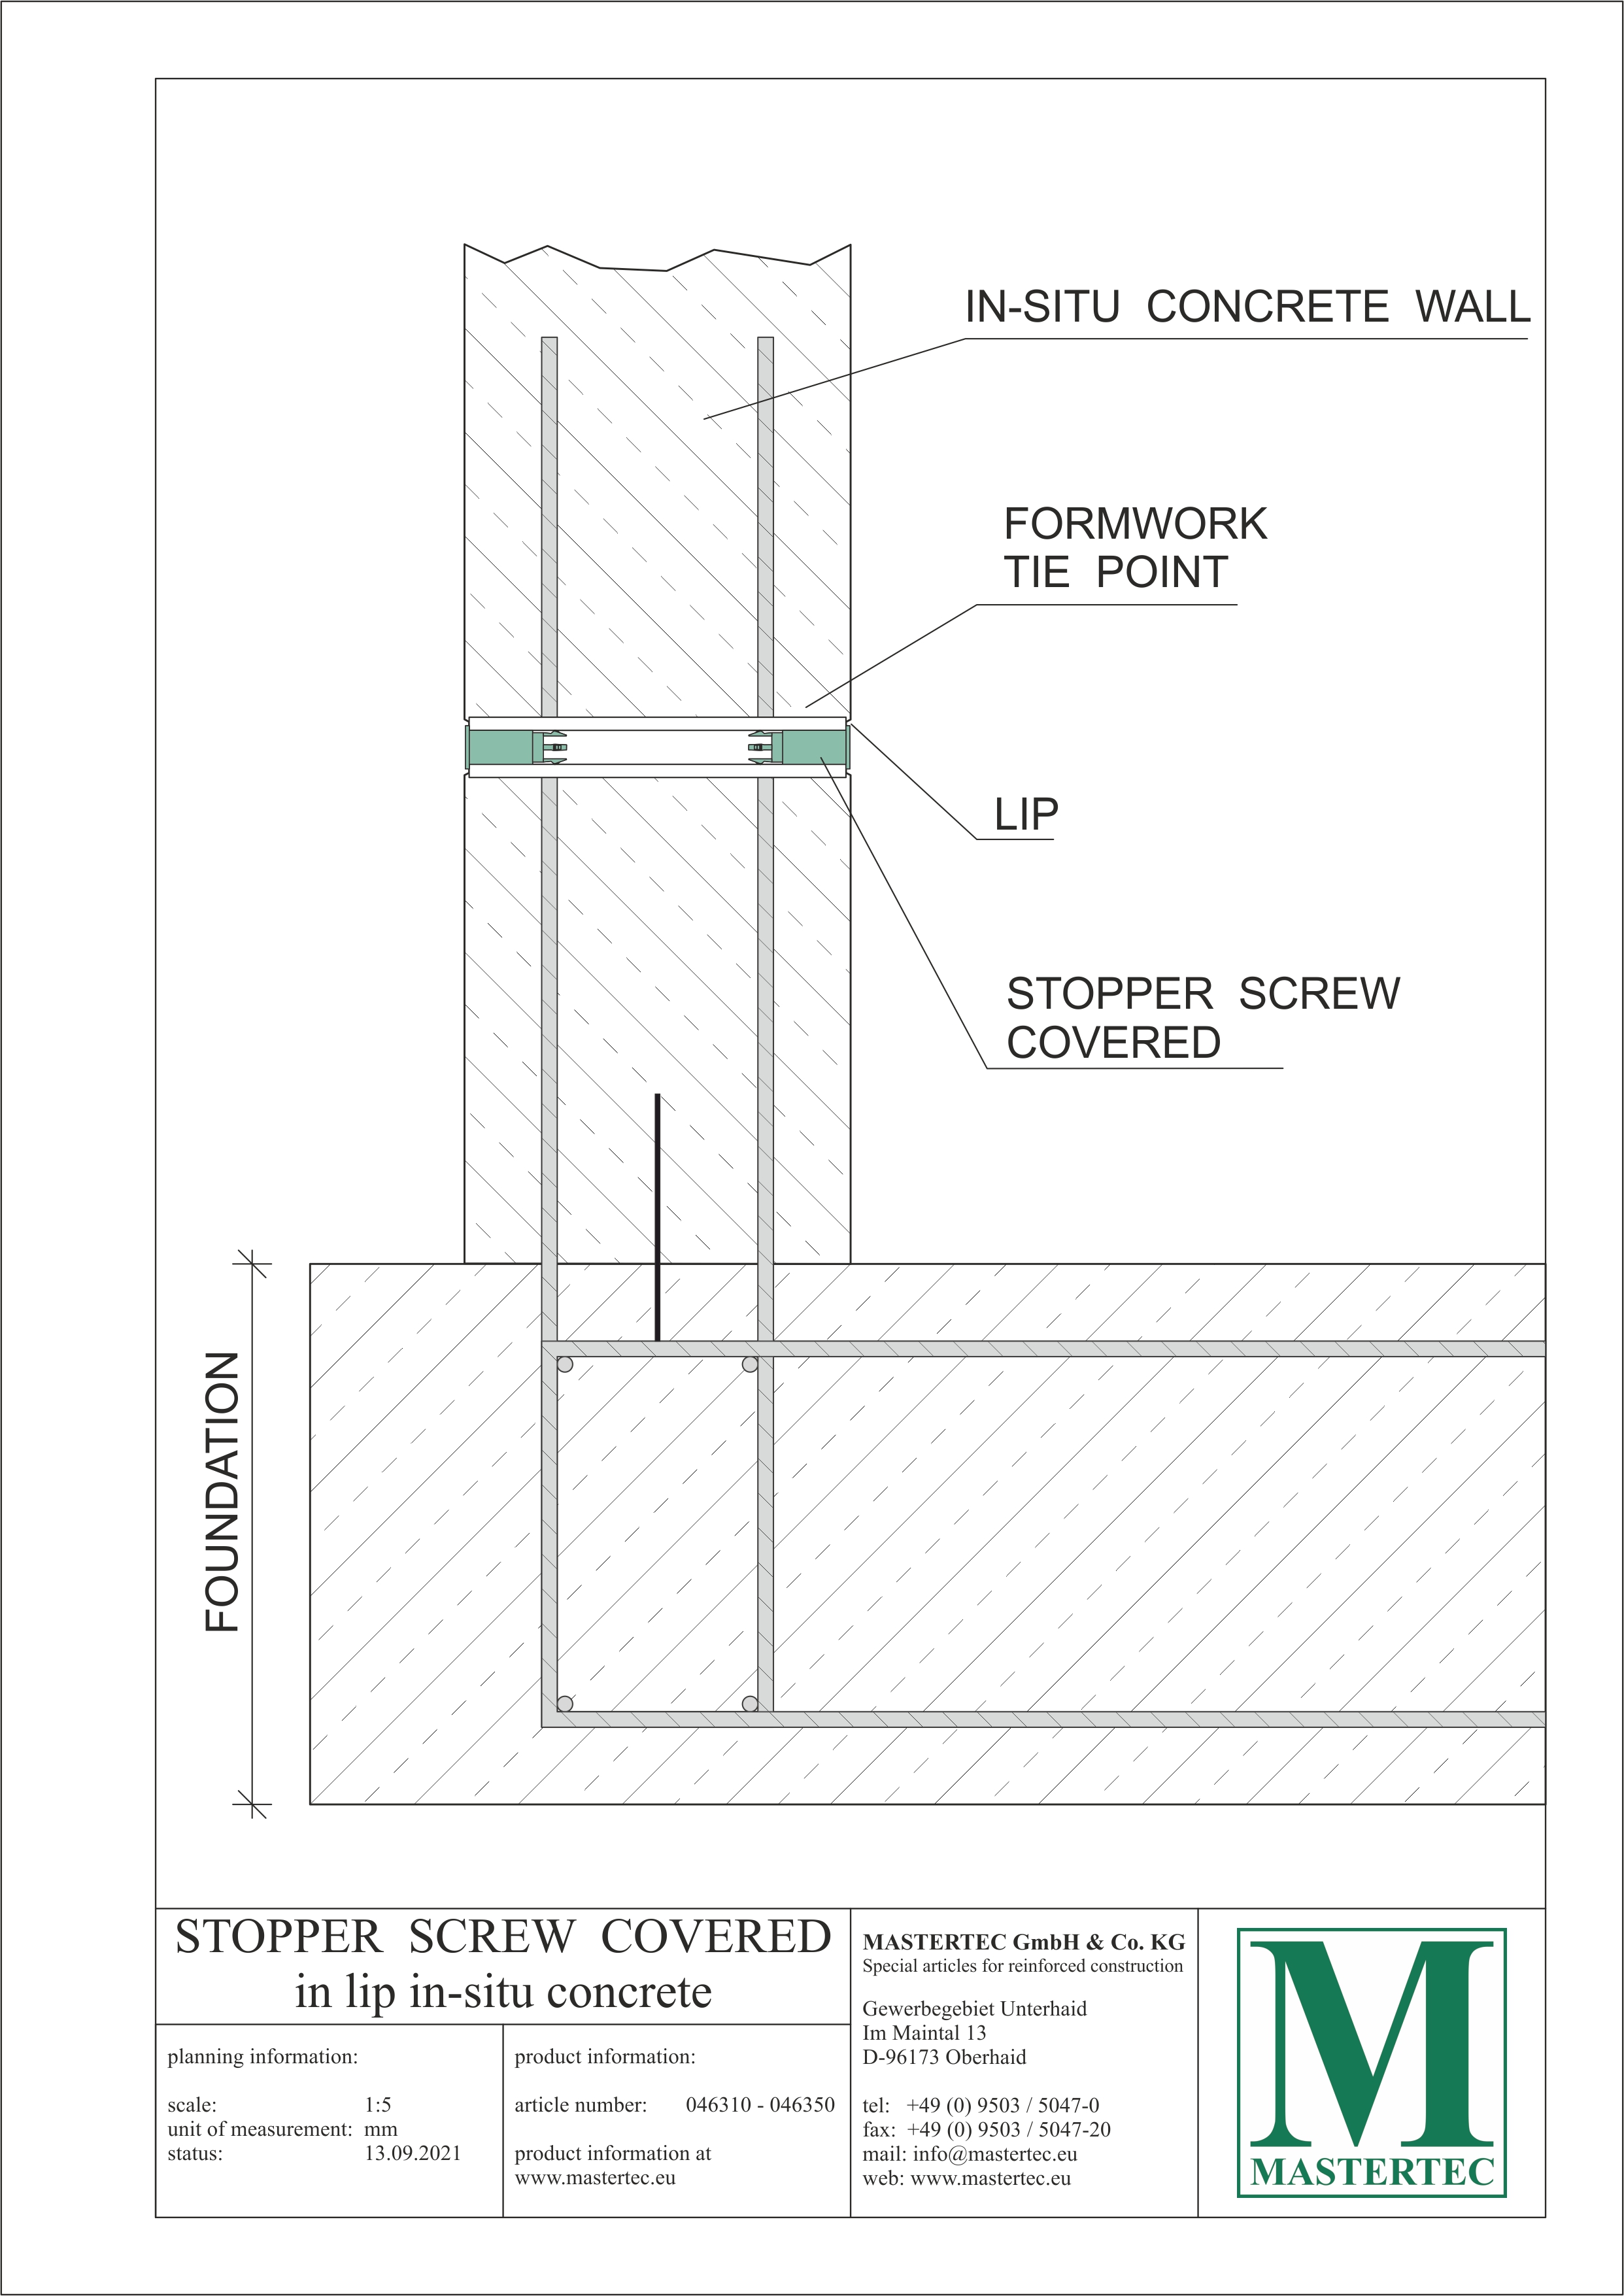
Preparation of tie point
Clean the inside of the tie point. Remove loose particles and dust before installation of STOPPER SCREW type covered .

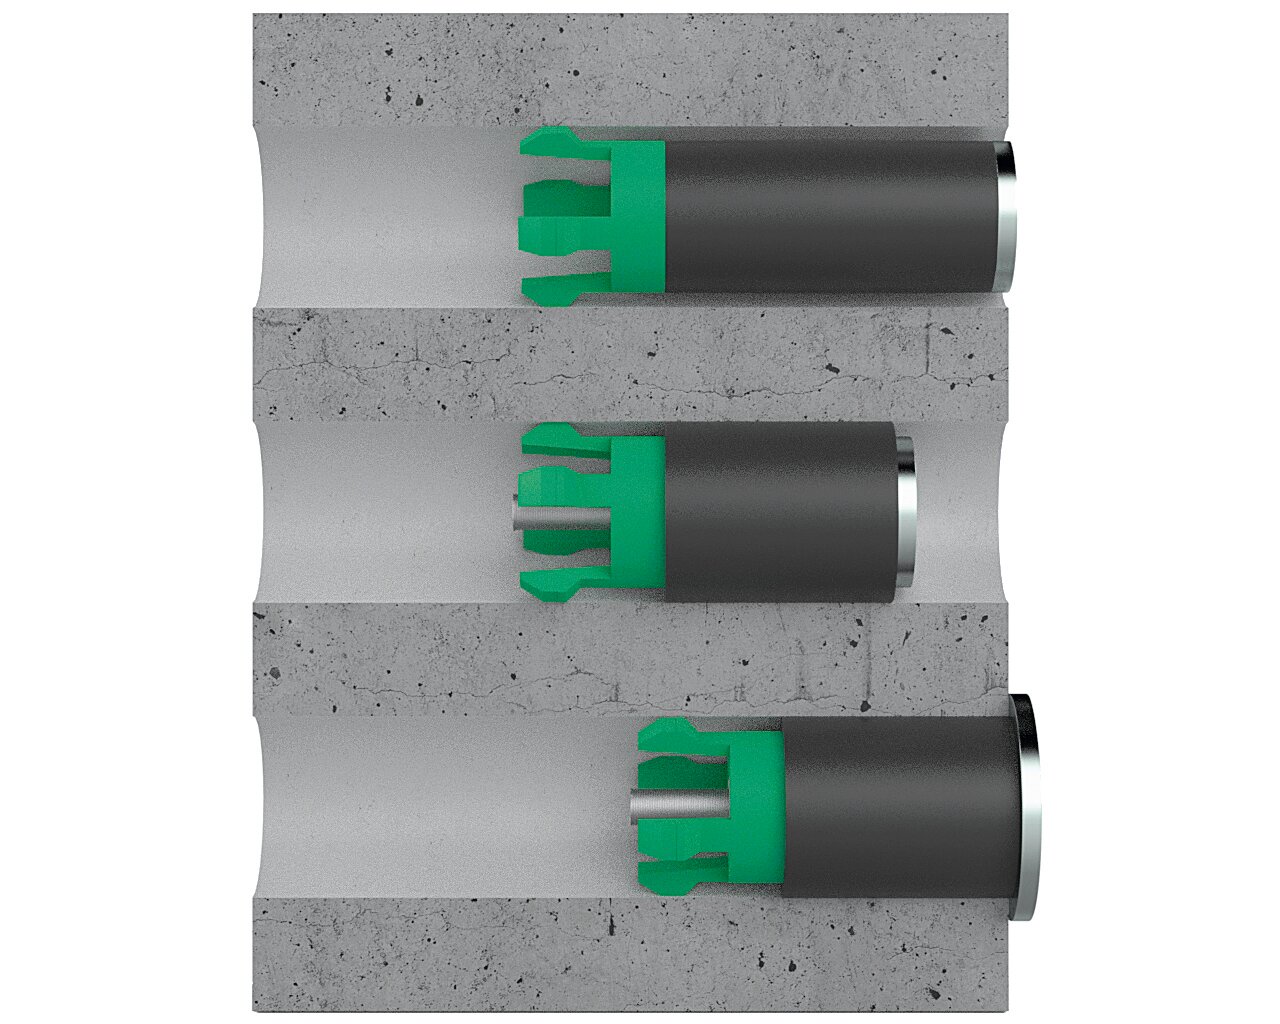
1. Insertion
Insert the STOPPER SCREW type covered into the clean tie point to be sealed. To do this, position the claw of STOPPER SCREW type covered in such a way that all 4 claw ends are inside the clearance of the tie point. With a hammer blow onto the pressure plate the claw of STOPPER SCREW type covered slips into the tie point and centres itself.

2. Positioning
Push or hammer the STOPPER SCREW type covered completely into the tie point.

3. Tightening
Tighten the screw of STOPPER SCREW type covered with a cordless screwdriver. Use speed class 1.
Then tighten the screw of the STOPPER SCREW type covered with the torque wrench to a torque of 4Nm (5Nm for conical anchor holes).
With our STOPPER SCREW torque set, this step can be done more easily.

STOPPER SCREW type covered mounted in tie point with cone.
Status: 14.12.2022

Akcesoria
odpowiednie akcesoria

Skontaktuj się z nami
Chętnie odpowiemy na Twoje pytania